
In the bicycle braking system, the brake pad is one of the most critical safety parts. The brake pad plays a key role in whether the braking effect is good or bad.
If there are strange noises and a significant reduction in braking force, the brake pads may be worn and need to be replaced in time. Here's a guide on disassembling and installing brake pads:
Tools Required:
New brake pads
Allen wrench or HITWAY 16-in-1 tool
Steps:
Remove the brake pads.
Prepare the Bike for Maintenance. Turn off the bike and remove the battery.
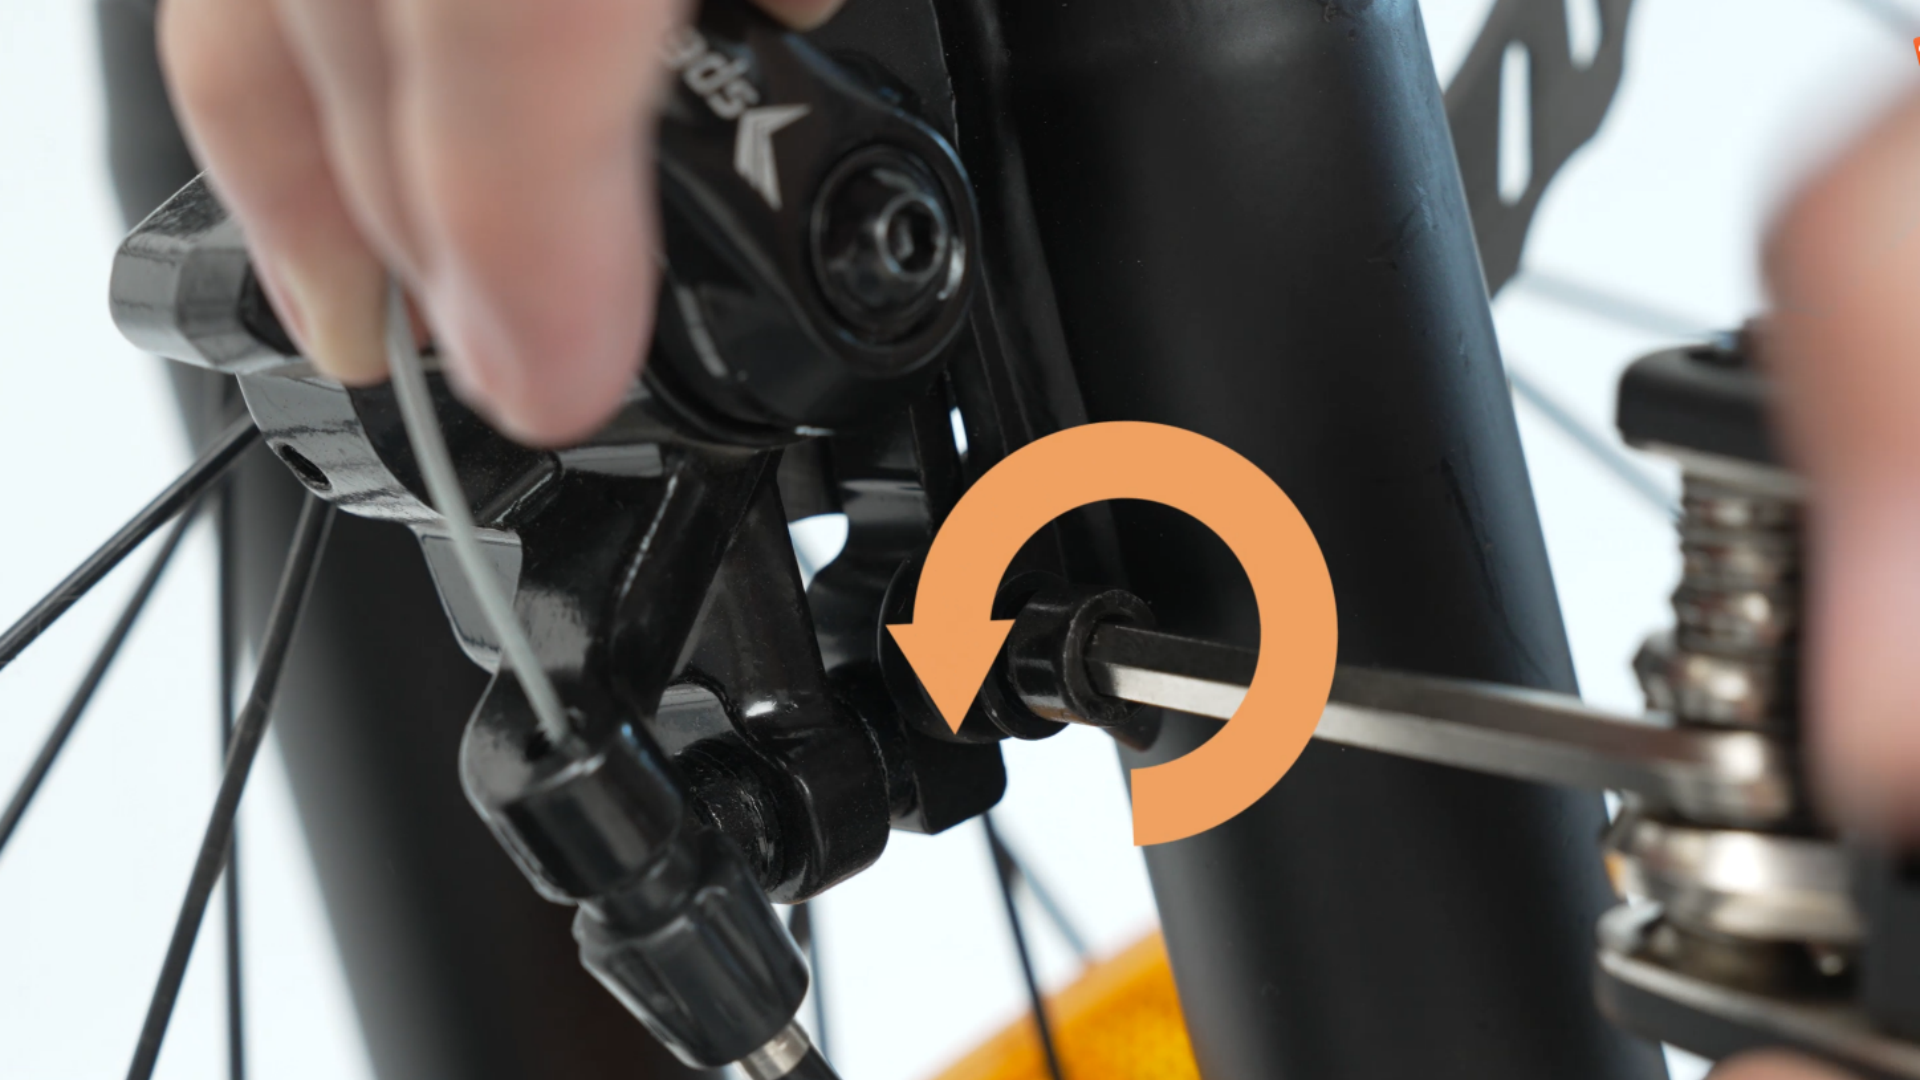
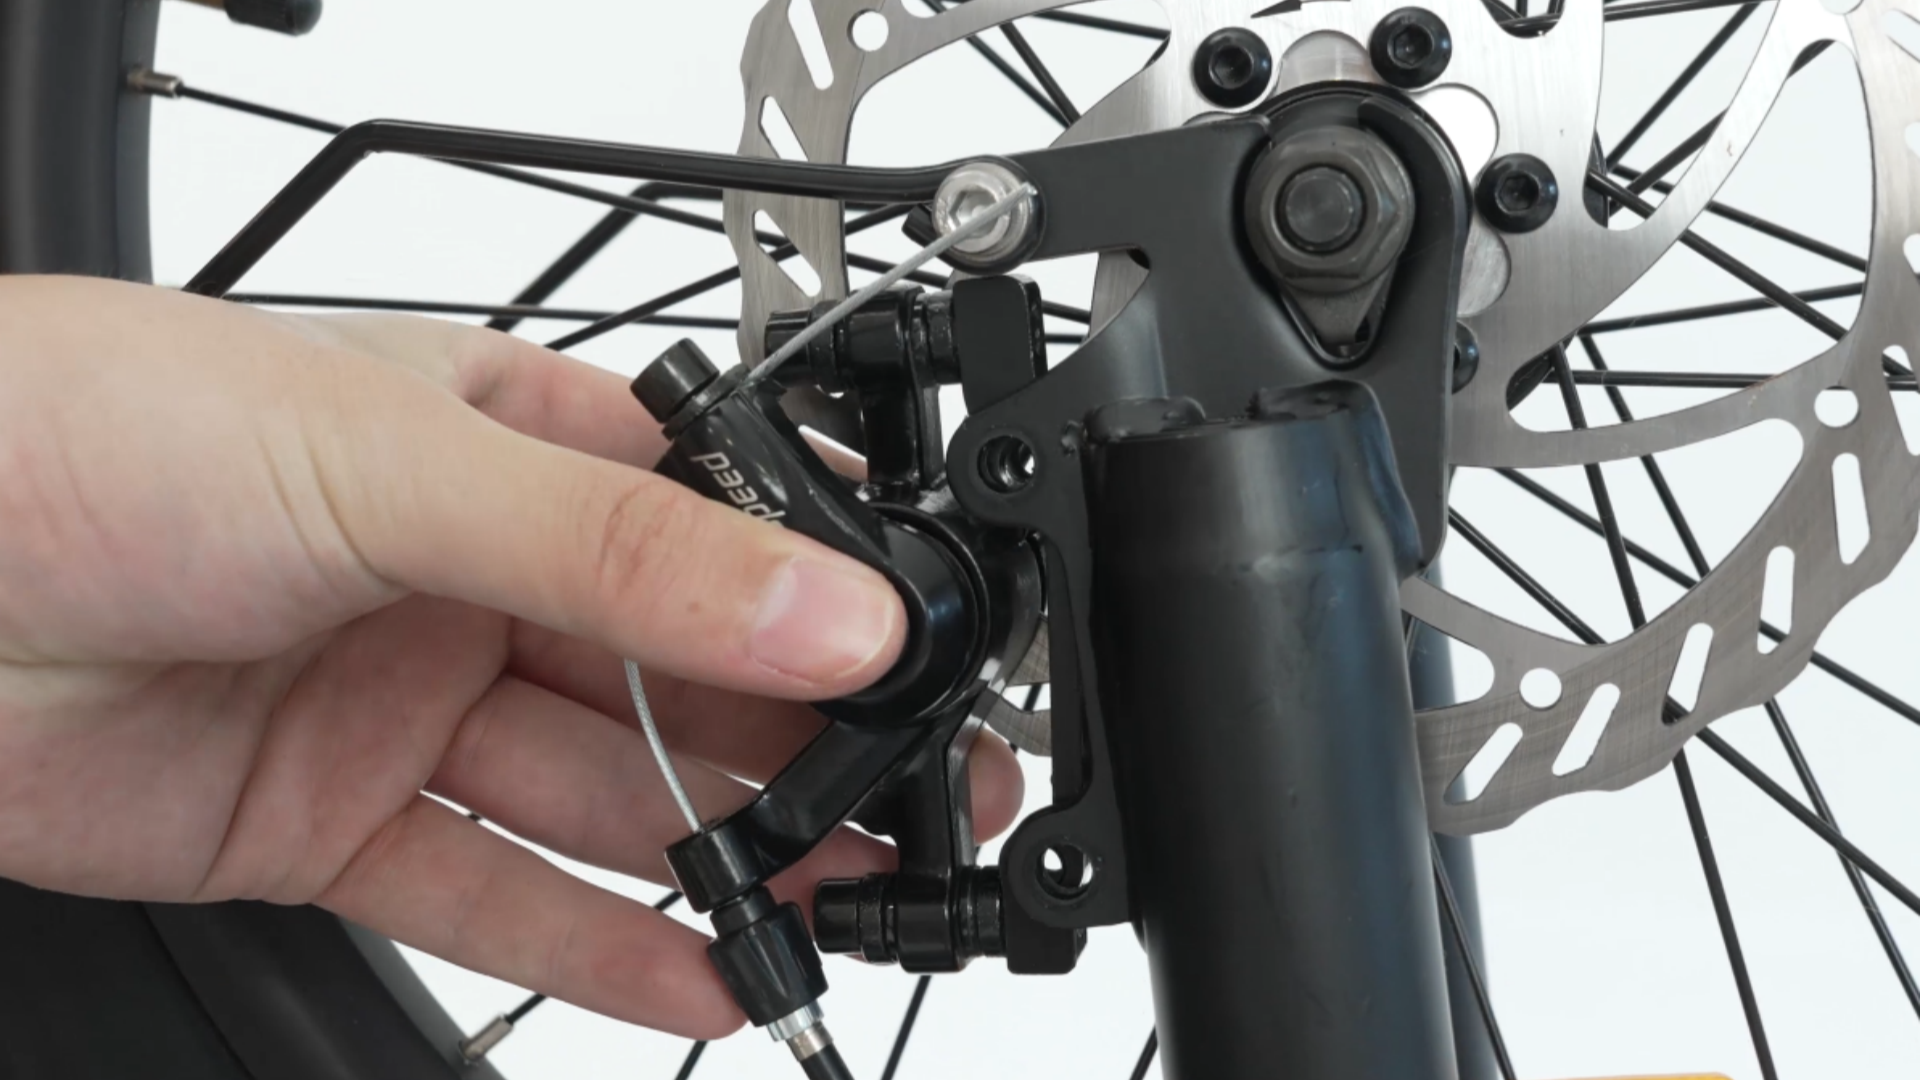
Remove the brake caliper from the frame. Use an Allen wrench to remove the two brake caliper bolts counterclockwise.

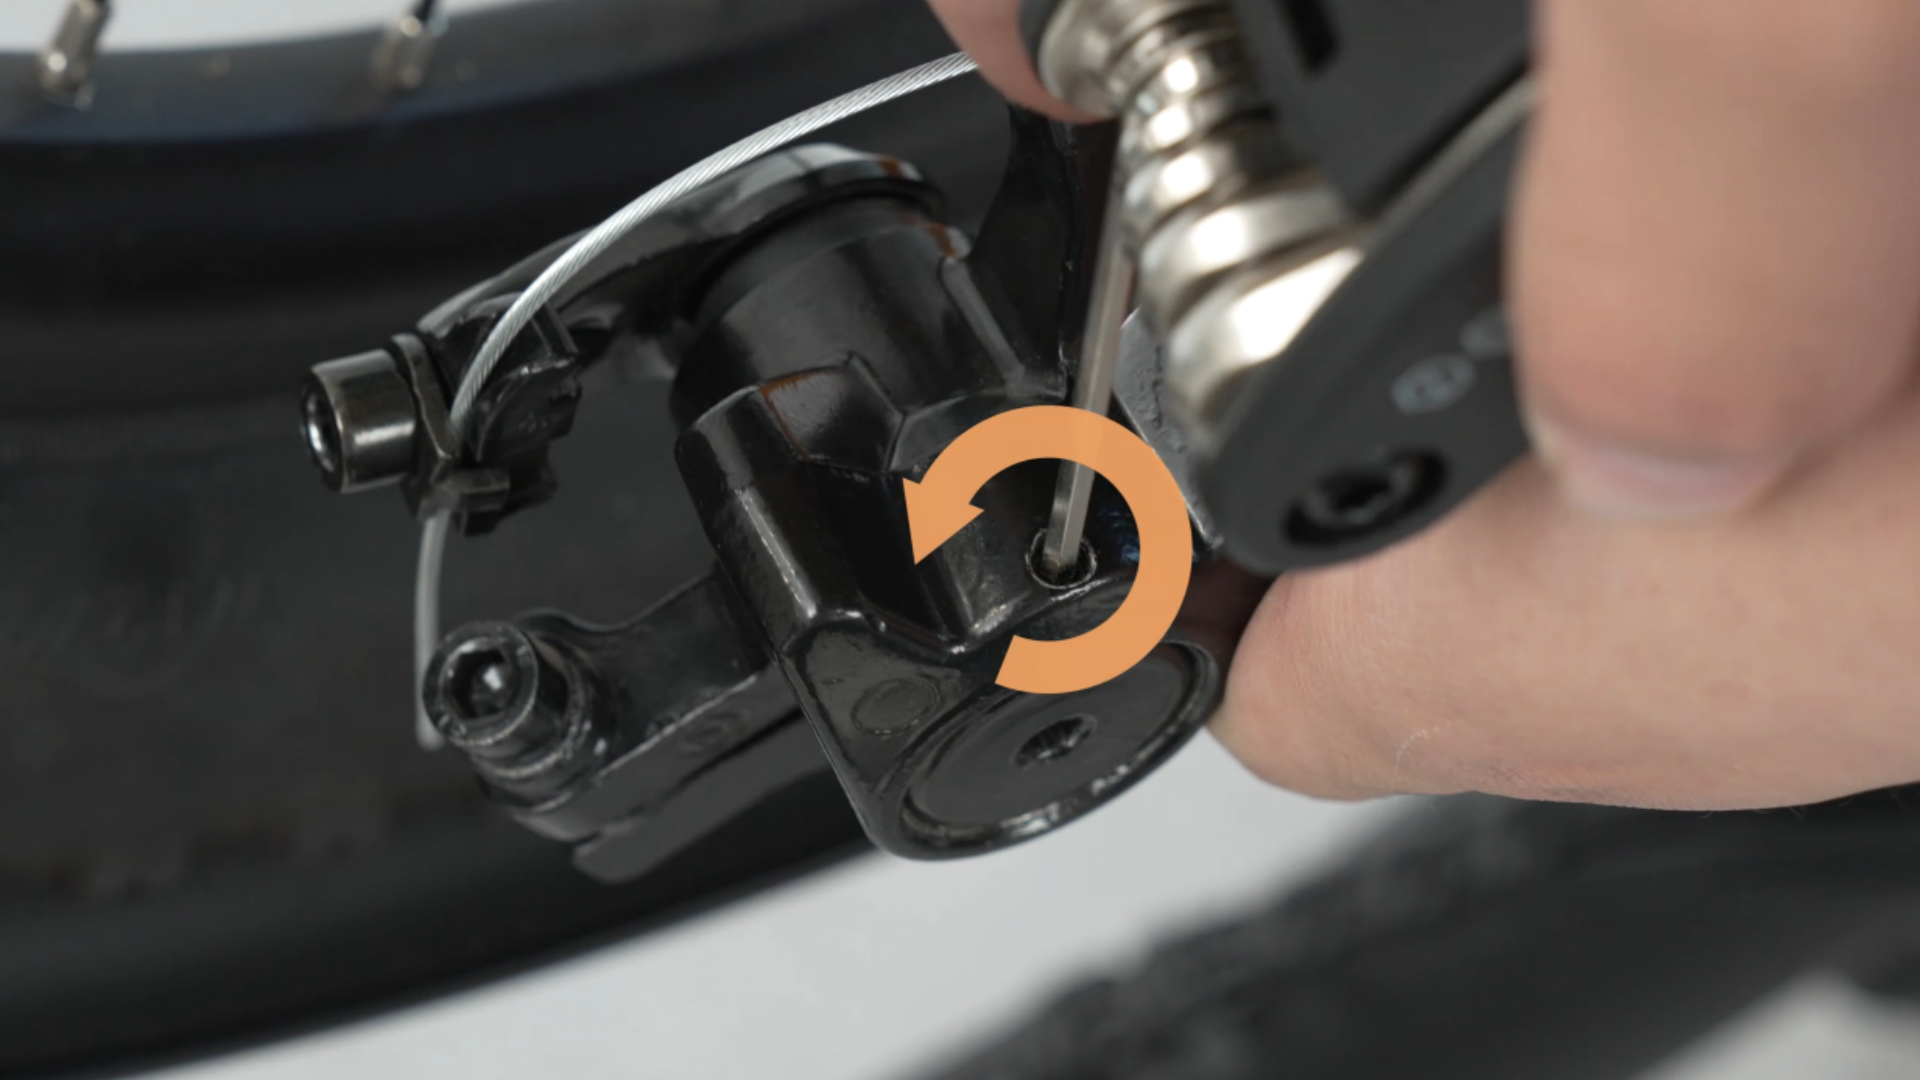
Remove the brake from the frame. Using an Allen wrench, turn the position shown in the picture counterclockwise to loosen the brake pads.
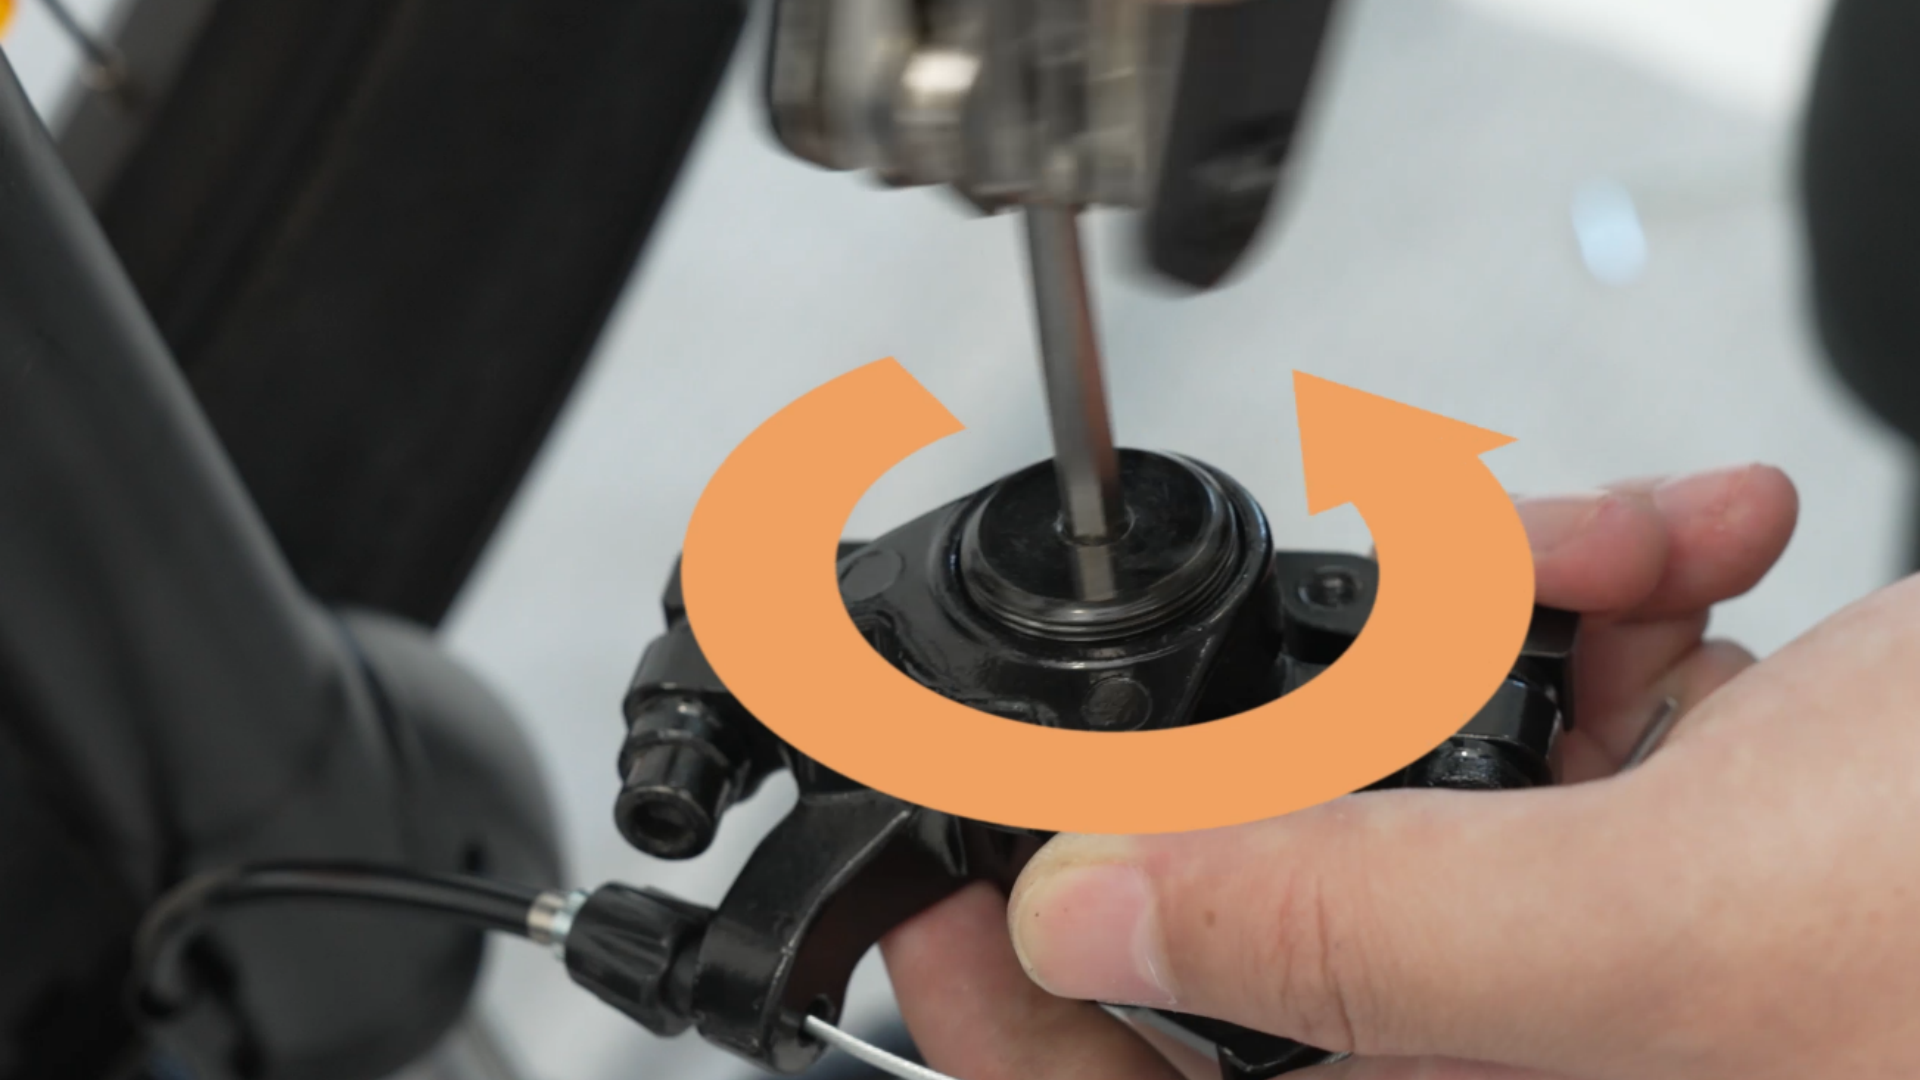
Turn the center of the round piece clockwise to remove the round piece.
Take out 2 old brake pads.
Install new brake pads
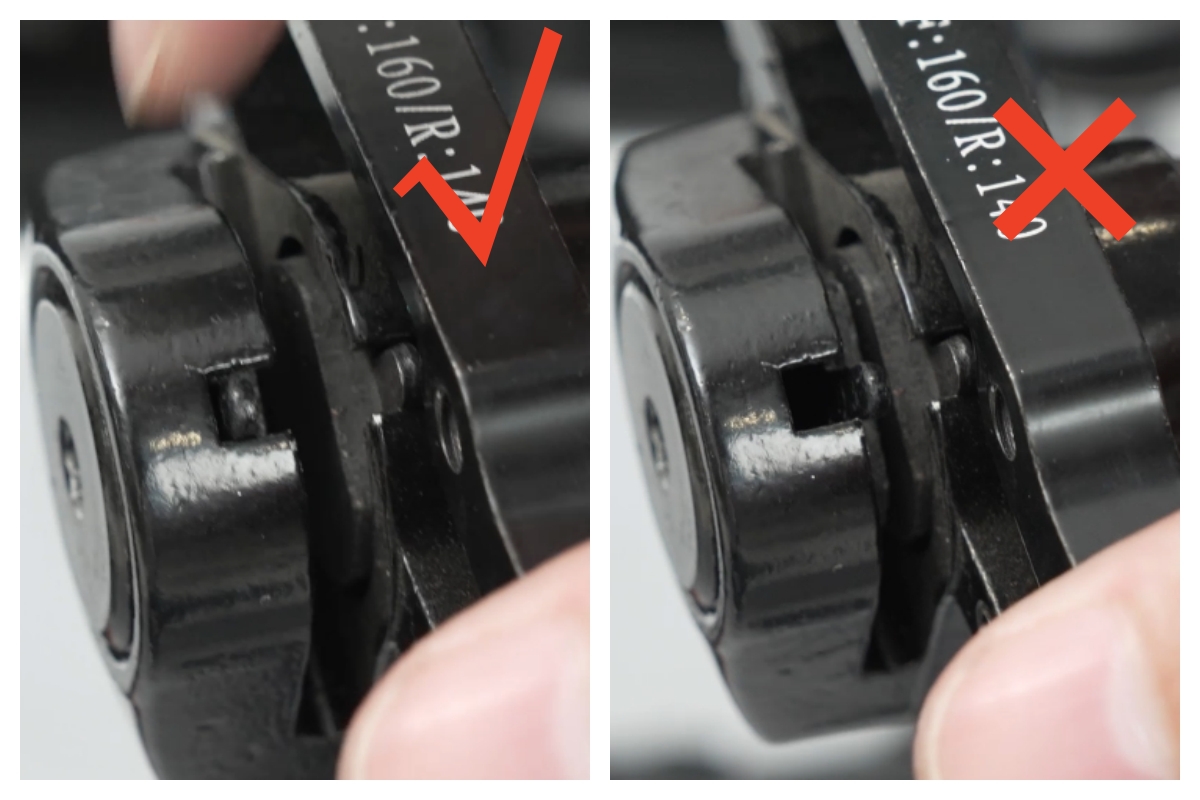
Install the brake pads and note that the two brake pads need to be aligned.
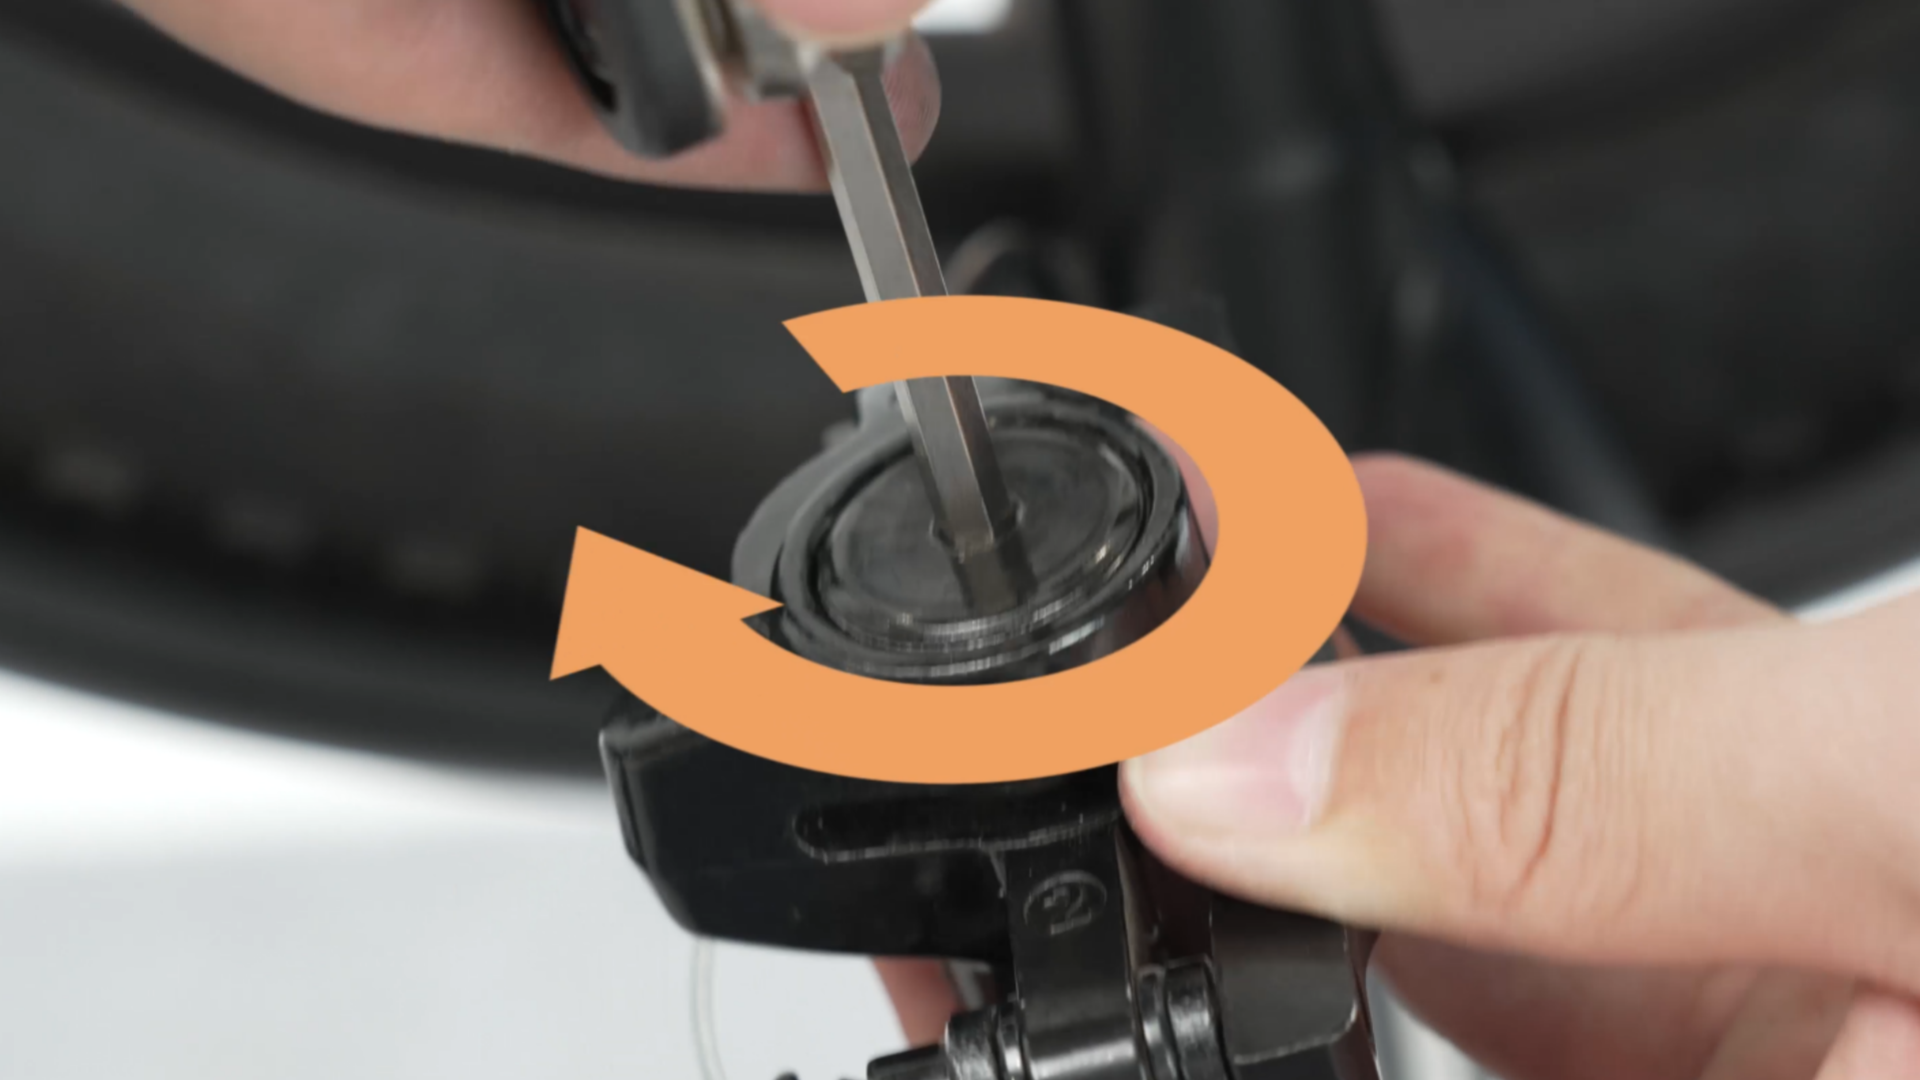
Twist the round part back counterclockwise to secure the 2 brake pads.
Adjust the position of the brake pad so that the brake pad is attracted by the magnet.
Install the brake caliper to the frame. Using an Allen wrench, tighten the bolt clockwise.

Turn the wheel to check that there is sufficient space between the brake pads and the brake disc when the wheel moves, and check the braking ability of the brake pads.
Test the Bike: Before riding, test the bike to ensure everything is functioning correctly.